Mini Corned Beef Sliders
Highlighted under: Snacks & Small Bites
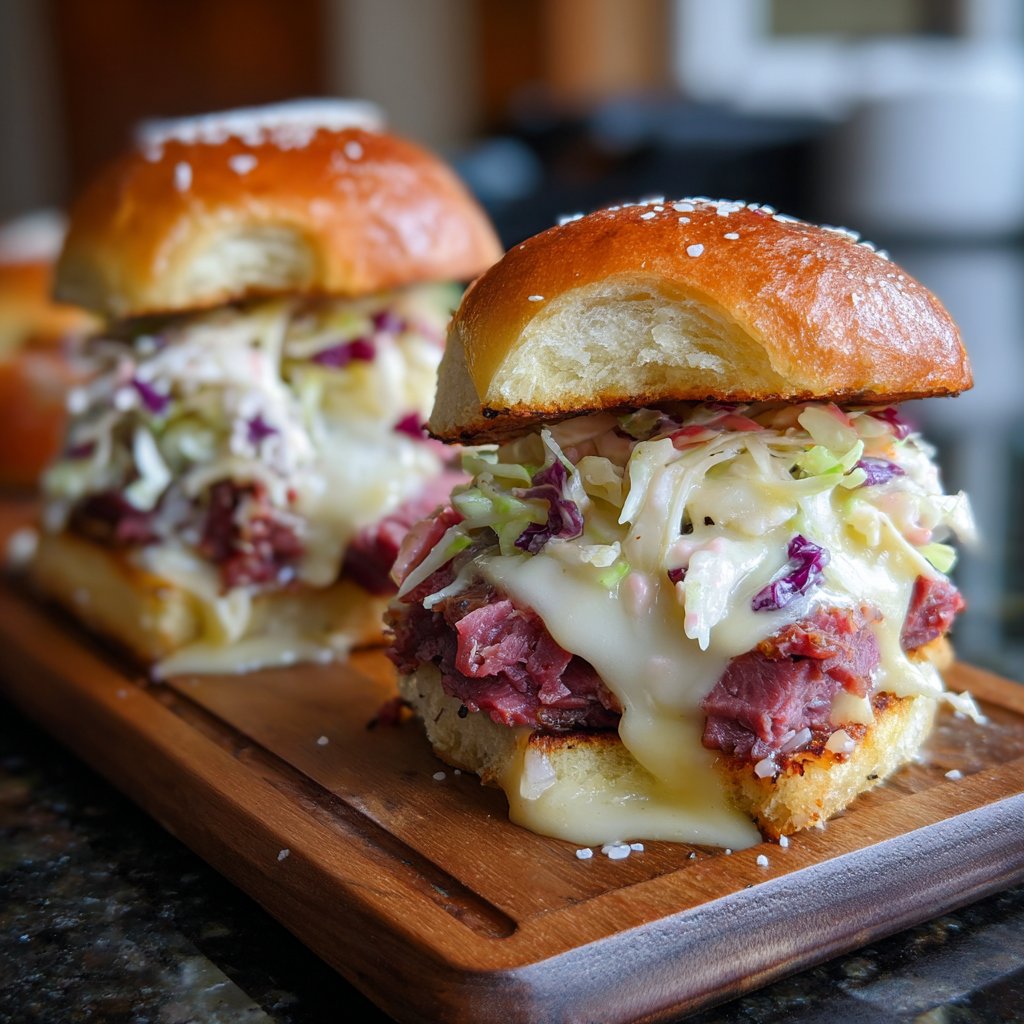
I love whipping up these Mini Corned Beef Sliders for gatherings. They’re quick to assemble, and everyone always raves about the combination of flavors. The savory corned beef paired with creamy dressing and crispy cabbage makes for a perfect bite-sized snack. Whether it’s game day or a casual dinner with friends, these sliders are a surefire hit. Plus, they’re super easy to customize with your favorite toppings, turning a simple recipe into a showstopper.
When I first made these Mini Corned Beef Sliders for a friend's party, I was blown away by how easily they vanished. I layered corned beef and creamy dressing on soft slider buns, and they turned out to be the star of the evening. The trick I found is to toast the buns slightly before adding the filling, which adds a nice crunch and prevents them from becoming soggy.
Since then, I’ve experimented with different toppings like spicy mustard and pickled jalapeños. Each bite bursts with flavor! If you want to elevate this dish for a special occasion, consider a drizzle of homemade thousand island dressing for that extra zing.
Why You Will Love This Recipe
- Savory corned beef packed in a soft slider bun
- Unique and flavorful toppings to customize your slider
- Perfect finger food for parties and game day
The Importance of Quality Ingredients
When making Mini Corned Beef Sliders, the quality of your ingredients is essential for achieving that irresistible flavor. Opt for high-quality corned beef; freshly sliced at your deli will provide the best texture and taste. Avoid pre-packaged varieties if possible, as they can be overly salty or less flavorful.
The creamy dressing is also a crucial component. A homemade dressing with fresh ingredients will elevate your sliders significantly. If you’re using a store-bought version, look for one with a clean ingredient list and minimal preservatives.
Don’t overlook the shredded cabbage. This adds not only crunch but a little sweetness, creating a delightful balance with the savory corned beef. Choose crisp, fresh cabbage that has vibrant color and avoid any that looks wilted or yellowed.
Assembly Techniques for Maximum Flavor
When assembling your sliders, consider what order you layer your ingredients. Placing the corned beef directly on the bun ensures it absorbs some of the bun’s flavor, while the crunchy cabbage on top creates a perfect contrast in texture. Be liberal with your dressing, as it binds the ingredients together and adds moisture, making each bite a delight.
If you’re adding cheese, I recommend using a flavorful option like sharp cheddar or pepper jack to complement the spices in the corned beef. Placing the cheese on top of the dressing helps it melt perfectly as it heats in the oven, preventing it from becoming rubbery or dried out.
For those who enjoy a little heat, consider adding sliced jalapeños or a drizzle of hot sauce before serving. It introduces an extra layer of flavor that contrasts nicely with the creaminess of the dressing.
Ingredients
For the Sliders
- 12 slider buns
- 1 pound corned beef, sliced
- 1 cup shredded cabbage
- 1/2 cup creamy dressing (like ranch or thousand island)
- 1/2 cup shredded cheese (optional)
- Salt and pepper to taste
Instructions
Prepare the Slider Buns
Preheat your oven to 350°F (175°C). Slice the slider buns in half and place them on a baking sheet. Lightly toast them in the oven for about 5 minutes to give them a nice crunch.
Assemble the Sliders
Layer each bottom half of the buns with sliced corned beef, followed by shredded cabbage. Drizzle the creamy dressing over the top of the cabbage and sprinkle with cheese if using. Season with salt and pepper.
Finish and Serve
Place the top halves of the buns on each assembled slider. Return the sliders to the oven for an additional 5 minutes, allowing the cheese to melt and the sliders to heat through. Serve warm and enjoy!
Pro Tips
- Feel free to add your favorite toppings such as pickles, jalapeños, or extra sauce for a twist on these sliders. Experiment with different cheeses to find your perfect flavor combination!
Make-Ahead and Storage Options
These sliders can be assembled ahead of time, making them an ideal option for parties. Prepare them up to the baking step, cover with foil, and refrigerate for up to 24 hours. When you’re ready to serve, simply pop them in a preheated oven to heat through and melt the cheese – no extra effort needed on the day of your gathering.
If you have leftovers, store the assembled sliders in an airtight container in the fridge. Reheat them in the oven at 350°F (175°C) for about 10 minutes or until heated through. Microwaving isn’t recommended, as it can make the buns soggy and the cheese rubbery.
You can also freeze unbaked sliders. Wrap them tightly in foil and place them in a freezer-safe bag. They can be frozen for up to 3 months. When you're ready to enjoy, bake from frozen, adding a few extra minutes to the cooking time.
Variations to Try
Feel free to switch up the toppings based on your preference. You can add sliced pickles or even a tangy coleslaw for crunch. For those who enjoy a smoky flavor, a sprinkling of smoked paprika or some crispy bacon bits can bring a new dimension to your sliders.
If you want a lighter alternative, swap out the corned beef for turkey or chicken. Use a creamy tahini dressing or yogurt for the sauce to keep the assembly fresh and add a healthful twist. The crunchy cabbage will still provide that satisfying texture.
For a vegetarian version, use roasted vegetables or a hearty mushroom patty in place of the corned beef. Add a slice of provolone or mozzarella to maintain that gooey cheese effect. These adaptations retain the spirit of the original sliders while catering to dietary preferences.
Questions About Recipes
→ Can I make these sliders ahead of time?
Absolutely! You can assemble the sliders a few hours in advance and keep them covered in the refrigerator until you’re ready to bake them.
→ What kind of dressing works best?
I find that ranch and thousand island are excellent choices, but feel free to experiment with other dressings that suit your taste.
→ Can I use leftover corned beef?
Yes, leftovers work perfectly! Just slice it thinly, and you're ready to go.
→ How can I make these sliders gluten-free?
You can use gluten-free slider buns and ensure that the corned beef and dressing are gluten-free as well.

Mini Corned Beef Sliders
Created by: The Hazelsrecipes Team
Recipe Type: Snacks & Small Bites
Skill Level: Easy
Final Quantity: 12 sliders
What You'll Need
For the Sliders
- 12 slider buns
- 1 pound corned beef, sliced
- 1 cup shredded cabbage
- 1/2 cup creamy dressing (like ranch or thousand island)
- 1/2 cup shredded cheese (optional)
- Salt and pepper to taste
How-To Steps
Preheat your oven to 350°F (175°C). Slice the slider buns in half and place them on a baking sheet. Lightly toast them in the oven for about 5 minutes to give them a nice crunch.
Layer each bottom half of the buns with sliced corned beef, followed by shredded cabbage. Drizzle the creamy dressing over the top of the cabbage and sprinkle with cheese if using. Season with salt and pepper.
Place the top halves of the buns on each assembled slider. Return the sliders to the oven for an additional 5 minutes, allowing the cheese to melt and the sliders to heat through. Serve warm and enjoy!
Extra Tips
- Feel free to add your favorite toppings such as pickles, jalapeños, or extra sauce for a twist on these sliders. Experiment with different cheeses to find your perfect flavor combination!
Nutritional Breakdown (Per Serving)
- Calories: 300 kcal
- Total Fat: 18g
- Saturated Fat: 7g
- Cholesterol: 70mg
- Sodium: 890mg
- Total Carbohydrates: 20g
- Dietary Fiber: 1g
- Sugars: 2g
- Protein: 18g